Upcycling a Cat Activity Tree
Another exciting craft project for me. Not my first experience of cat tree upcycling but it ended up taking a lot longer to complete than I imagined. I'm so pleased with the results of this one. Amazing what I achieved with some material, sisal rope, glitter, varnish, glue and a staple gun.
Cat furniture and scratching posts are much loved in our house. We have several around the house including three in our living room. I love having cat trees as it means the cats can display normal behaviour. Mine love sleeping at different levels and adventuring at different heights.
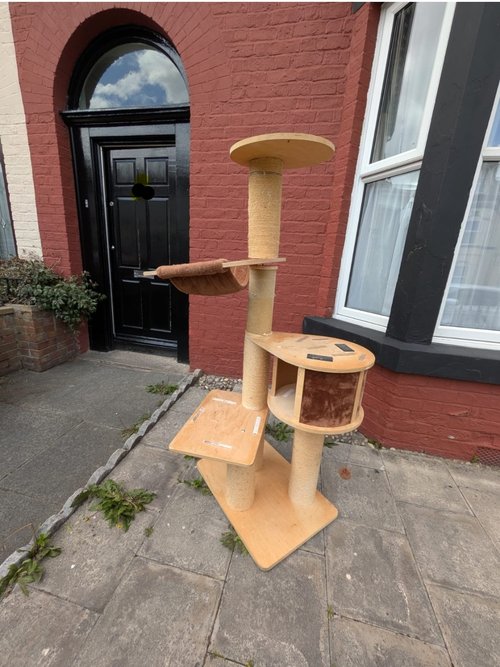
A customer replaced their cat tree while I was visiting and the old one wasn't needed any more. I was very fortunate to have their old one. The cat tree had been loved and well used. It was completely solid with just wear to the rope and beds.
This cat tree was much better quality than I'd ever bought for my cats. The tubes were solid; plus they were wider than normal ones. The platforms were made of thick plywood and the well designed structure meant there was no wobble. Not even with big cats mountaineering on it! Having so much height and different sleeping options, made this one a winner.
This wasn't my first experience of cat tree upcycling, but it ended up taking a lot longer to complete than I imagined. (Click here to see my last effort.) I'm so pleased with the results of this one. Amazing what I achieved with some material, sisal rope, glitter, varnish, glue and a staple gun.
As I'd recovered and upcycled activity trees before, I didn't think it would be a big job. That was my first mistake. Turns out that having a decent tree to upcycle was more labour intensive. The previous cat tree upcycling consisted of recovering the platforms with material.
With this scratching post, I had a couple of themes in mind and then changed my mind to do it circus themed to go in our circus room. However, I did a more sedate circus style compared to normal. Tried to go along the subtle, classy route rather than full on bright colours and flashing lights.
Dyeing the Rope
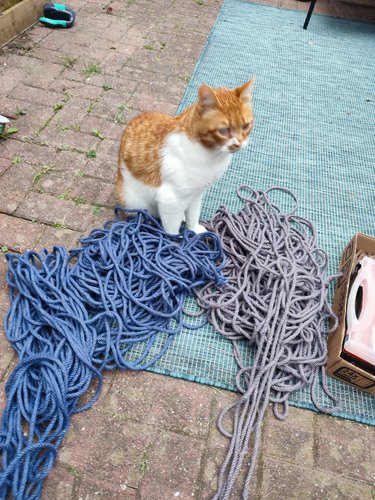
Unfortunately I had the bright idea to get pretty coloured sisal rope to make the whole tree aesthetically pleasing. It was very expensive and I thought it would be easier to dye some. I got my other half and my children to do the maths to work out how much rope I needed - about 70m was needed!
To dye the rope, I used cold water dye in a bucket outside. I was worried about dying all of our backyard blue especially as my inner Frank Spencer appears at times like this. I did find it was difficult washing the rope to make sure that the excess dye had been washed off.
As there was so much rope, I dyed it in two batches. With the second rope, the colour came out a slightly different shade... I didn't have a big enough bucket to dye all of the rope at once. Plus I may have got distracted and left it in for a different amount of time. Every now and then I agitated the rope to make sure that the dye had saturated all of the rope. Hmm.. this was mostly successful but I could tell that there were areas where the rope hadn't been dyed as much.
Note to self.... never dye rope in large amounts again. It was a nice idea, but the hardest part was untangling the rope after it was dyed, washed and fully dried. Fortunately my handy husband offered to use his cable untangling skills to help when I got frustrated with it. Thanks Ben! Perhaps if I had a larger bucket it would have been easier. Didn't fancy dying my bath blue - it did cross my mind at the time.
Replacing the Rope
With having two slightly different colours of rope, I decided to have both on each scratching post. This produced a lovely stripy effect and I think it looked nice.
Fortunately when I took the tree apart, I had labelled the top of each scratching post. This helped when putting the rope back on so that the stripes on each post went in the same direction. I used a hot glue gun to make sure the rope was attached well at each end. I used a staple gun to attach the rope around the top, with the odd staple on the way down the pole. Then lots of staples around the base on each pole. With having the two parts of the sisal rope, both had to be secured well which took a while to do.
Bean was very interested in all of the process. From the moment the tree arrived, he wanted to be in it. He 'helped' with all the rope untangling and then again with wrapping the posts. He does like to be involved in everything and moving items are much more fun for him.
Wooden Parts
With the wood, I removed all of the velcro etc and then sanded it down. It came up lovely with minor scratch marks removed easily. I used plain varnish to protect the wood but at the last moment I put some decorating glitter in it. The wood looked like new. I love the sparkles in it but certain family members aren't so keen. That's only to be expected.
Replacing the Soft Furnishings
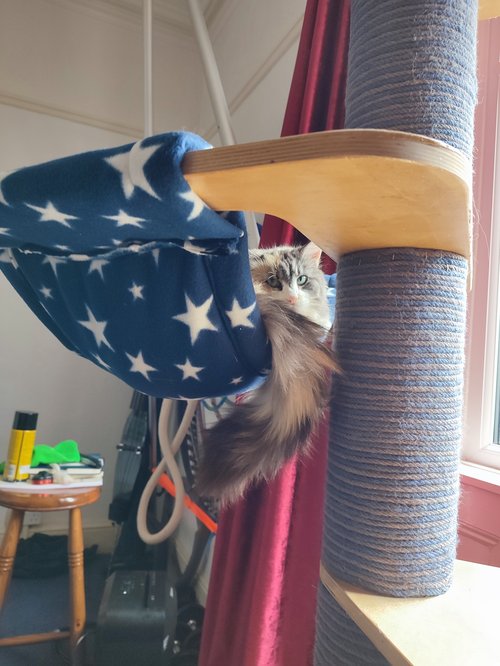
I used the old hammock as a pattern to make a new on. It was difficult due to the cats wanting to sit on it! Fermi sat on the hammock as soon as I put it on the floor to work out how to replicate it. I had washed the beds first as I knew this would happen. Any sewing projects are just invitations for my cats to come and sit on patterns and new material.
To make the hammock I used quilting material and covered it in fleece. I was very surprised that all the layers managed to get sewn in my sewing machine. Mine is a tight fit so it is solid for when a cat is sat on it. This is easily removed for washing. With hindsight, I wish I'd made the hammock smaller as it does sink lots when a cat sits on it.
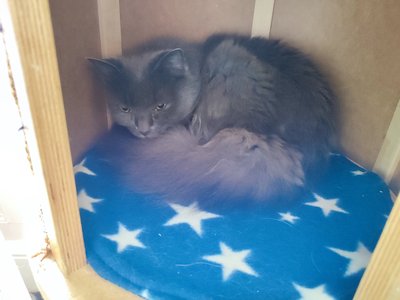
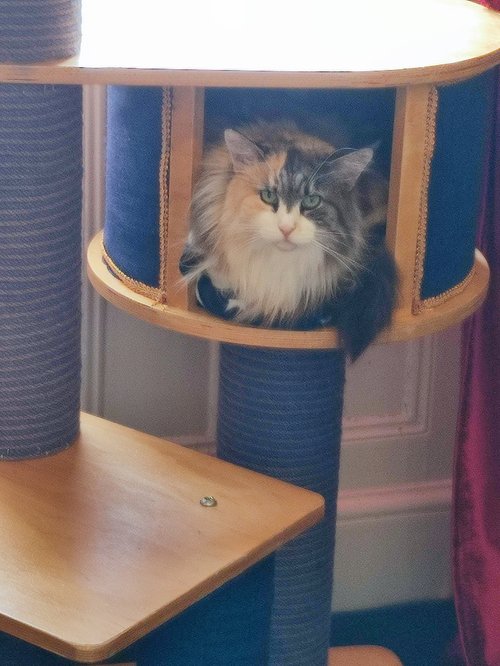
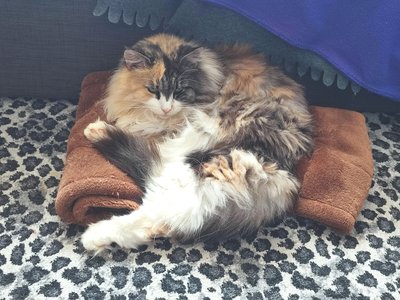
With the spare material, I made a round pad to put in the covered box. This has been a great hit with the girls as they both love it. The photo on the left is Daisy-Bear in box on the quilted pad. You can see how spacious the bed is.
There was a bed on the top platform but I decided to leave this just as a wood platform. I wasn't sure how best to attach a bed safely. It turns out that the cats like sitting on it to look out of the window. This platform is at the height of where the window opens so they can sniff the air and keep an eye on their territory.
I wasn't too sure about what to do about the outside of the box. It was a brown material that couldn't be removed. In the end I used spray glue to attach blue hessian. Then I used my trusty staple gun to attach some gold braid around the edge to make it more circus themed.
Before and After Photos
Thank you very much to Dave, Vicky and Charlie for giving this to me. It was such a great scratching post to start off with. I literally just gave it a new lease of life with a lick of paint and new rope.
The activity tree is now in our back room. My cats absolutely love it! Fermi uses it the most - she loves the hammock for relaxing in and uses the sleeping box. I'm so pleased she has it as another safe place. All three of our cats use the scratching post bits. (They still use the sofa as well still.)