Handpainting a Rug
Looking for something different with your house decor? Feel more maximalism? Well you've come to the right place to get some creative inspiration. As a plus side, all of these designs are cat related!
The Idea for Rug Painting
For someone who wears a lot of black, I do like colours as well. And crazy patterns. Over the years we have had some weird house décor as I tended to choose things that make me laugh. The most memorable was the fluffy zebra print material for the living room curtains. Then most recently we got a wild leopard print carpet for the living room. It still makes me giggle when I see it.
At the end of last year, I happened to see on Facebook that someone had painted their carpet. Lots of lovely random rainbow shapes. This got me thinking….
I decided that this was just what I needed to do with our house. It turns out that you can get a special liquid, mix it with acrylic paint, heat it and it will stay on fabric. Yes I know you can purchase fabric paint but it is usually really expensive and in tiny bottles. I needed lots! I wasn’t sure how it would turn out so didn’t want to ruin a carpet I already had. So I decided to paint a rug.
Let me tell you, this is a new addictive hobby! I started with a new rug that was given to me for this purpose. Then I went on to one we already had in the hallway. Then I bought another one. My family did laugh at me as they think our living room carpet is crazy enough without added crazy rugs.
How to paint a rug
Equipment used
- Scola fabric medium
- Acrylic paint
- Paint brushes
- Hair dryer
Preparation
First of all, vacuum and if necessary, clean rug.
Plan design and draw on rug if necessary. I tried using charcoal but this didn’t work well so ended up using a permanent marker. (This was seen under the paint though but it was ok as I did black outlines.) A fabric marker that disappears would have been better.
- Mix paint and fabric medium – check instructions for quantities
- Paint!
- Apply heat to painted area
I used a hairdryer. I don’t know if this was correct but it seemed to work and I could do at patch at a time.
The paint and fabric medium was mixed in old plastic cups that we use for art. These were easily washed out afterwards.
The rug painting took several sessions – once dried until tacky, I moved it to a safe place to dry until I could continue.
Water was used to wash brushes etc.
Important lessons learnt
It doesn’t work so well on longer pile rugs as the paint sticks the strands together. I only realised this afterwards. Brushing the rug won’t separate the strands either.
Don’t use black permanent marker to do the design, it will show through. Especially if drawn in wrong place. Pencil or a pen in a similar colour worked better. But that wasn't easy to see at times.
It can be difficult to do detail on a fuzzy surface.
The cats were unsure at first about walking on the painted bits. They have got used to it with time.
Finished Painted Rugs
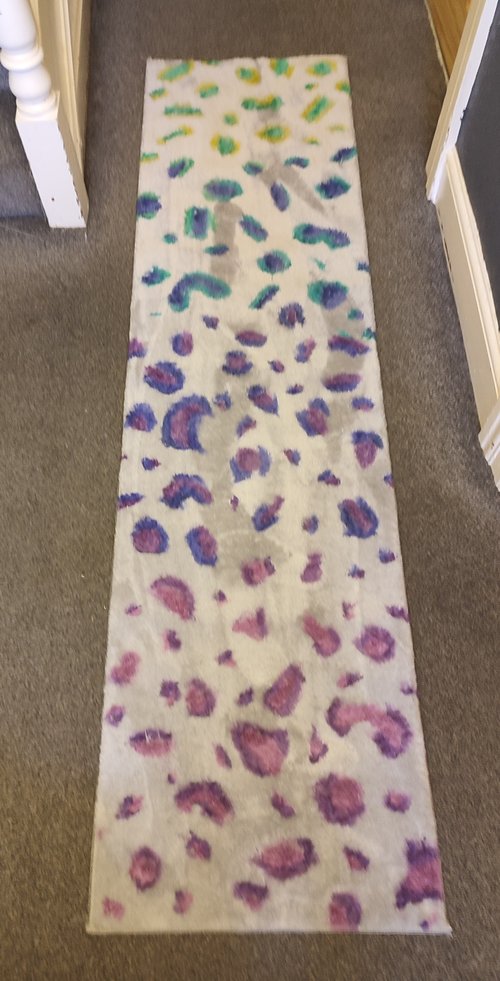
The first rug I painted was a rainbow leopard rug. This is a design idea I had in my head as I love rainbow colours and thought the leopard print would go with the crazy living room carpet. Although when it came down to painting, I had to look on the internet to see what leopard print looked like. We used this one for about a year but then I binned it as it was too big to fit in the washing machine and it had lots of traffic over it.
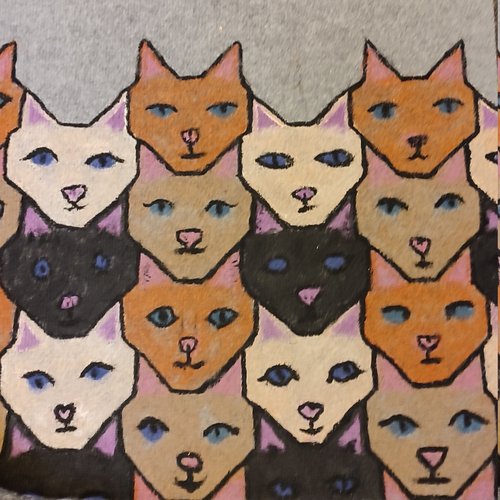
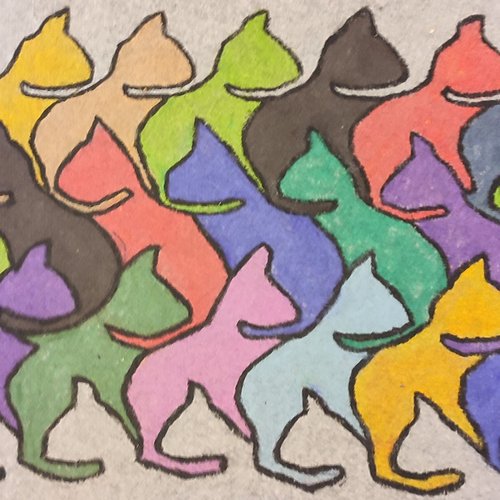
With the second rug I painted, I wanted to try something different. This time I tried a more formal, precise, tessellation design. I thought I’d start in the middle and work my way to the ends. However, after a short time, the design had shifted so I left it as it was.
Then when the middle of the rug was finished, I couldn’t stop and thought I’d do each end as well but with a different design. I’d mixed some of the grey paint but it dried darker than I thought.
To do the tessellation pattern, I found patterns on the internet and then passed them to Ben to reshape, size and print off for me. (He is better with design than me.)
Once I decided that the first one needed to be replaced, I bought a washable rug and painted rainbow paw prints. It's funny as it was a couple of days before Ben noticed I'd changed rugs. I love the paw prints but wish I'd done more. I used a pattern of Bean's paw from a previous time he'd stepped in paint. I also love the small mice paw prints I did on it.
Rug painting is so much fun. I love having something a bit unusual and quirky. They make me smile when I see them.